A stucco house out here should hold a good exterior paint job for a long stretch. Ten years is reasonable. Longer than that is common when the work was done right. So when somebody in Riverside or Corona calls us at year three because the south wall is streaking and the paint is coming off in sheets around the garage, that is not the paint being bad. That is somebody having skipped a step.
We have been repainting stucco in this valley for fifty years and the failures are almost never mysterious. There are maybe five of them, they repeat constantly, and every one traces back to prep that got rushed or a product that was wrong for the surface. Here is what each one is, what it looks like when it starts, and the order of operations that keeps it from happening.
Failure One: Chalk That Got Painted Over Instead of Washed Off
This is the big one. If we had to point at a single reason exterior paint fails early on Inland Empire houses, it is chalking.
Here is what chalking is. Every exterior coating has pigment held together by a binder. Sun breaks that binder down over years, and as it goes, the pigment is released as a fine powder sitting loose on the surface. Rub your hand on an older painted stucco wall and look at your palm. If it comes away dusty and the color of your house, that wall is chalking. Out here the sun is relentless and the coatings chalk faster than they do in milder climates. A wall that faces south or west in Jurupa Valley or Norco is getting hammered from about ten in the morning until sundown, most of the year.
Now think about what happens when somebody puts a fresh coat over that powder without removing it. The new paint has nothing solid to bond to. It is bonding to loose dust, and that dust is bonding to the wall underneath by nothing at all. The film sits there looking perfect for a year or two, then it starts releasing in sheets. Not flaking in little chips like normal weathering. Sheeting, coming off in pieces you can peel with your fingers, often with the old chalk layer still stuck to the back of it.
The fix is not complicated. It is just work. The wall gets washed properly, and washed means enough pressure and the right cleaner to actually carry the chalk off, not a garden hose waved at it. That is the whole point of house washing before a repaint. Then, on a wall that is still chalky after washing, it gets a masonry conditioner or a bonding primer that penetrates and binds whatever residual powder is left into a solid film the topcoat can grab.
Somebody quoting your exterior who does not mention washing is quoting you a failure with a delay on it.
Failure Two: Hairline Cracks Skinned With Wall Paint
Stucco cracks. That is not a defect, that is stucco. It is a rigid cement product on a house that moves, and the Inland Empire gives it plenty to move for. Heat expansion in summer, cooling at night, seasonal soil movement, and the occasional shake. Hairline cracking around window corners, at the ends of headers, and running off the corners of garage openings is normal on almost every stucco house past a certain age.
What is not normal is what most people do about it. They take regular exterior wall paint and they roll it over the cracks. That paint film is thin. It bridges the crack for about as long as the house holds still, which out here is until the next hot afternoon. The crack opens under the film, the film splits right down the middle of the crack, and now you have a paint line that has torn instead of a stucco line that was cracked. Water gets in through the split, sits behind the coating, and starts pushing the surrounding paint off from behind.
Here is the part people miss. Once water is behind the film, the failure spreads sideways well beyond the original crack. You will see a hairline crack with an inch or two of bubbled, lifted paint on either side of it. That whole zone has to come off and be rebuilt.
The right approach depends on the crack. Genuine hairlines get bridged with an elastomeric material that stays flexible and moves with the wall instead of tearing. Anything wider than a hairline is not a coating problem at all, it is a crack repair job, meaning the crack gets opened up, cleaned out, patched with a proper cementitious material, and textured to match the surrounding wall before anything gets painted. Trying to fill a real crack with paint is how you get a visible worm of caulk running across your wall that reads from the street.
Failure Three: Thirsty Stucco Stretching One Thin Coat
Stucco is porous. It has an appetite. Older stucco that has never been sealed or has weathered its old coating is thirstier still, and bare patched areas are the thirstiest of all.
What happens when a crew sprays one coat on that surface and calls it done: the wall pulls the liquid out of the coating fast, before the film has a chance to level and build. What is left behind is not a proper film thickness. It looks covered from ten feet away, especially wet. Then it dries and you start seeing the texture read through unevenly, the color looking blotchy in raking light, and the deep parts of the texture holding less material than the high spots.
A coating only protects at its designed film thickness. Underneath that, it is just tinted surface. It weathers fast, it chalks early, and the whole cycle starts again years before it should.
This is the exact place where thinning paint does the most damage, and it is worth saying plainly why we care so much about it. The owner spent years working for a company that would thin material to stretch it and put half the specified paint on the job. He is a Christian man, it never sat right with his conscience, and he left to start this company on the rule that we do right by everybody. That is why we use the manufacturer specified amount of paint on all surfaces. On a thirsty stucco wall, thinned material is what turns a ten year coating into a three year one.
The right sequence on porous stucco is a proper masonry primer or conditioner first, which seals the appetite and gives the topcoat a consistent surface, and then the manufacturer specified amount of finish on all surfaces. Not one stretched pass, because the film has to fill the low points of the texture and reach real thickness.
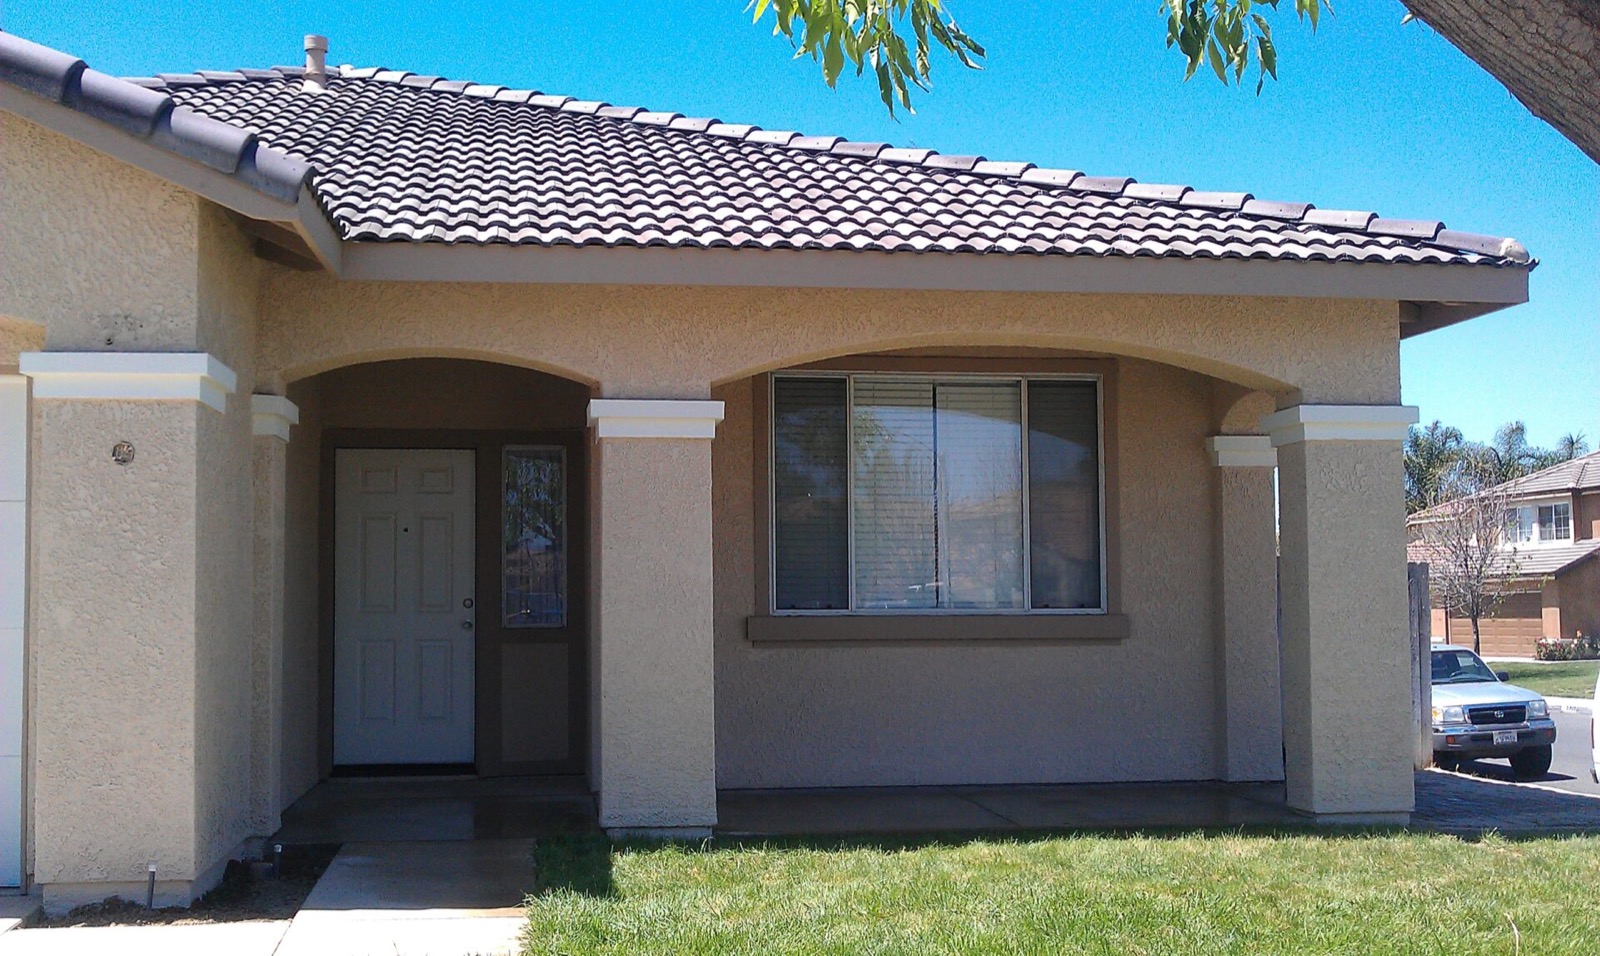
Failure Four: Sprinklers Writing on Your Walls
Walk any neighborhood in Eastvale, Menifee, or Chino Hills and look at the bottom three feet of the walls facing the lawn. You will see it on house after house: a band of white or tan discoloration, sometimes with a chalky crust, sometimes with the paint gone soft and lifting.
That is your irrigation. The water in this region carries a heavy mineral load, and every time a sprinkler head throws water against the stucco, that water evaporates and leaves the minerals behind. Do that twice a day for a few years and you have built a mineral deposit on the wall. Underneath it the coating is staying wet longer than it was designed to, cycling wet and dry constantly, and that cycling breaks down the film from below.
You can spot the pattern from the driveway without getting close. It has an arc shape to it, high in the middle and lower at the edges, because that is the shape of the spray. It stops at a consistent height. It is always worst on the walls closest to a head, and it is often worse on the side of the house nobody looks at.
Painting over mineral deposit is the same mistake as painting over chalk. The deposit has to come off first, and it does not come off with plain water. It takes the right cleaner and enough dwell time to break the mineral bond, then a rinse. On heavy deposits the affected area gets a masonry primer after cleaning because the surface chemistry down there is different from the rest of the wall.
Then, and we say this to every homeowner who has it, go adjust the heads. We can put a perfect finish on the bottom of that wall and if the sprinklers keep hitting it twice a day it will come back. It is not the paint’s fault and it is not something a coating can outrun. Turn the head, cap it, or move it. Five minutes with a screwdriver protects the work.
Failure Five: The Sun Side Never Got the Film It Needed
Here is a thing you can check on your own house right now. Look at the north wall, then walk around and look at the south and west walls. On a house whose paint is aging normally, all four elevations look tired in roughly the same way. On a house whose paint is failing early, the sun sides are visibly further gone than the shaded sides, sometimes dramatically.
Some of that is unavoidable. The south and west walls of a house in Perris or Hemet take more ultraviolet in a year than the north wall takes in three. But the gap is usually much wider than it should be, and the reason is film thickness.
When a crew is spraying a house, the sun sides are the miserable walls. Hot surface, glare, material flashing off fast, nobody wanting to be there. The coating gets applied thinner and faster and the wall is already too hot when it goes on, which means the film skins before it can level and build. Meanwhile the shaded north side gets applied in comfortable conditions and lays down beautifully. Same house, same day, same paint, two very different coatings.
The right way is to chase the shade. You start on the elevation the sun has left and you work around the house with it, so no wall gets sprayed while it is hot enough to flash the material. On summer jobs out here that can mean starting very early and stopping in the middle of the afternoon rather than pushing through and getting a bad film on the worst wall. It takes longer. It is the reason your exterior house painting job should not be quoted as a two day sprint in July.
Reading Your Own Walls From the Driveway
You do not need a ladder or a moisture meter to know whether your house is in trouble. Stand at the end of your driveway, then walk the perimeter once, and look for these.
- A dusty hand. Rub a painted wall in a couple of spots. Colored powder on your palm means chalking, and it means the wall needs washing and binding before anything else goes on it.
- Split lines instead of crack lines. A crack that shows a torn paint edge on both sides of it has already let water behind the film. That is a repair, not a repaint.
- Bubbling with a hollow feel. Press a bubbled area. If it gives and sounds hollow, the coating has lost its bond to the stucco underneath. That whole area is coming off.
- An arc of discoloration low on the wall. Sprinkler minerals. Look for the shape and the consistent height.
- Rust colored streaks running down from a fastener or a vent. Something metal is corroding behind or through the wall and bleeding through the coating. That gets sealed with the right primer or it will come right back through your new paint.
- Sun sides visibly worse than shade sides. Thin film on the hot elevations from the last job.
- Paint peeling off fascia, eaves, and trim before the stucco. Wood is a separate system with separate failure modes and it usually goes first. Soft, punky wood at the fascia ends means rot, and rot has to be cut out and replaced, not painted.
- Efflorescence. A white crystalline bloom pushing out through the surface, usually low on the wall or near a planter. That is moisture moving through the wall from behind and depositing salts on the way out. Painting over it traps the moisture and the new coating pushes off. Something is letting water into that wall and it needs to be found first.
Most of what people see from the street is one of those eight. You can photograph what you find and send it to us before we ever come out. We will tell you honestly whether you are looking at a repaint or a repair, and those are not the same conversation. There are plenty of examples of both on our project gallery.
The Repair First Sequence That Prevents All of It
Every one of these failures gets prevented by the same order of operations. It is not clever and it is not proprietary. It is just refusing to skip anything.
Walk it and find the water. Before anybody quotes anything, somebody walks the whole perimeter and figures out why the last coating failed. If there is a source of moisture, a bad flashing, a downspout dumping against the wall, an irrigation head, a planter holding soil against the stucco, that gets identified. Painting a wet wall is throwing material away.
Wash the house properly. Chalk off, dirt off, mineral deposit off, cobwebs and bird nests out of the eaves. Then let it dry. Stucco holds water and a wall that got washed on Tuesday afternoon is not ready for primer on Wednesday morning, especially on the north side and especially in cooler months.
Repair the stucco. Real cracks opened, cleaned, patched, and textured to match. Damaged or delaminated areas cut out and rebuilt. Holes from old fixtures and satellite mounts filled properly. This is the stucco repair phase, and it is the phase most likely to get skipped by somebody bidding on price, because patching and texture matching is skilled slow work that does not photograph as progress. A patch that does not match the surrounding texture will read through the finish forever. You will see it every time you pull in the driveway.
Deal with the wood. Fascia, eaves, trim, garage door jambs, any soft spot gets cut out and replaced before the coating goes on. Paint does not stop rot. It hides it for a season.
Caulk the moving joints. Window and door perimeters, penetrations, dissimilar material transitions. With a caulk that stays flexible and can be painted, not whatever was cheapest. This is the difference between a joint that stays sealed for a decade and one that splits open the first winter.
Prime what needs priming. Every patch. Every bare spot. Any wall still holding chalk. Any stain that will bleed. Any rusting metal. This is targeted work, not a blanket coat for its own sake, and it is where a lot of exterior jobs quietly go wrong.
The manufacturer specified amount, on all surfaces. Chasing the shade around the house, not fighting hot walls, at the coverage on the can with nothing thinned into it.
That sequence is the whole job. There is nothing exotic in it. The reason houses fail early is that somewhere in that list, two or three steps got compressed into one afternoon so the number could come in lower than the next guy’s.
When Elastomeric Is Right and When It Is Not
People hear elastomeric and think it is automatically the better choice for stucco. Sometimes it is and sometimes it is the wrong call, so it is worth being clear.
Elastomeric coatings go on much heavier than standard exterior paint and they stay flexible, which lets them bridge hairline movement instead of tearing. On a stucco house with widespread hairline cracking, that is exactly what you want, and it is a real solution rather than a patch.
Where it goes wrong is on a wall that has a moisture problem. Because the film is heavy and much less breathable, moisture trying to move out through the wall gets trapped behind it, and then the coating blisters off in large sections. If there is efflorescence, or a known leak, or a wall that has always been damp at the base, putting elastomeric on it makes the problem worse and more expensive.
It also will not save a wall with real structural cracking. If a crack is opening wide enough to see into, that is movement no coating handles, and the answer is repair first.
We look at the specific house and tell you which way to go. Sometimes it is elastomeric on the whole envelope. Sometimes it is targeted flexible bridging on the cracked areas with a conventional high quality acrylic over everything, which is our usual recommendation on stucco painting for houses that are cracking normally rather than badly. Anybody who recommends the same product for every stucco house has not looked at yours.
What You Should Ask Whoever Is Bidding Your House
You do not have to know coatings to protect yourself here. Ask three questions and listen to the answers.
Ask how the house gets washed and how long it dries afterward. If the answer is vague, or if washing is not part of the price, that is the whole conversation right there.
Ask what product goes on each surface and get it in writing on the quote. This is the single easiest way for a homeowner to verify that the material specified actually went on the wall, and it is the reason we put the count on our paperwork without being asked.
Ask what happens to the cracks specifically, and what happens to any soft wood. If the answer is that the paint will cover it, get another bid.
A crew that answers those three plainly is probably going to do right by you. A crew that gets cagey is telling you something.
Come Look at It With Us
If your stucco is streaking, bubbling, chalking on your hand, or splitting along the cracks, we will come walk the house with you, tell you what actually failed and why, and put together a ballpark with the repairs listed separately so you can see what you are paying for. If the honest answer is that you have a moisture problem to solve before anybody paints anything, we will tell you that too and we will not take the job until it is right.
Call us at (951) 685-1595, or send us a note here and we will find a time that works. There is no charge for the walkthrough and no pressure after it.